Few years ago, I posted the recipe of this saag on a Facebook group that I was a part of. I cannot even begin to explain the kind of comments that ensued. I was bombarded with thoughts like “this is not how saag is made”, “do not mess with the classics”, “where is …… ingredient in your saag”, etc. etc. I smirked and let it go but then one of the admins and a much-respected chef and restaurateur of Delhi area chimed in and responded to all the so-called authentic saag recipe advocates by saying that recipes are meant to be guidelines and not rules and that nobody should be jumping to conclusions without trying a recipe. BINGO! Exactly my thoughts. Now, if you have been tagging along my journey here at The Kitchen Docs for some time, you know how I feel about recipes. I have said, time and again, that all my recipes are meant to inspire and not restrict you to cook something a certain way. It is easy to follow a recipe as it is written assuming that it has been tried and tested and take comfort in the feeling that it will turn out OK because someone has taken the time and effort to measure, note down, and report everything used in a recipe. I stick to measures, times and temperatures while baking because it involves precise science. Other than that, you are the boss!
Saag, for me, has been a different experience at different stages of my life. As a little girl, I hated it – what was to love about a mushy green dish with a slightly pungent taste? As I grew older (I would say middle or high-school age), saag was always what Randhawa Auntie made. She was our wonderful neighbor and she would get fresh mustard greens (sarson) from her pind (village) and cook it for long hours on her backyard chullah (open stove) and then bring a container over to our house to share. Every. Single.Time. If I remember correctly, for a good 9-10 years, my mom didn’t even make saag. Just because – you know- Randhawa Auntie would always make it for us.
I didn’t have a recipe of saag in my handy dandy recipe notebook when we moved to the United States. So for may be a winter or two, we didn’t get to enjoy saag. Gasp. Then a very dear friend of ours got married to this awesome young lady, whose mom made a killer saag. I asked Puddan auntie for her recipe and she gave it to me, along with ingredients that we could easily buy here locally and not rely on any of the canned stuff. For example, replacing traditionally used Bathu with Broccoli – simply genius. I now make saag regularly in cooler season. This recipe is not exactly what Puddan auntie shared but is very close and I have changed a few things around to adjust it to our family needs and tastes (you knew this was coming).
If this recipe offends you because this is not how your grandma makes or made saag – please refer to the title! Hah!! So here it goes:
Ingredients:
Mustard greens – 3 bunches or 1 big bag of chopped mustard greens, about 5 lbs or 2 kg
Spinach – 1 bag or 1 big bunch, roughly chopped
Broccoli – 1 head, cut into big florets
Serrano peppers – 2 to 3 (to taste) – roughly chopped
Garlic cloves – 3, smashed
Ginger – 2 inch piece, roughly cut
Salt
Butter – 1 stick or ½ cup (use ½ if you think this is too much…but trust me, you need this butter)
Fine ground corn meal (Makki ka atta) – ¼ cup
For tadka (tempering)
Oil – 1 tablespoon (mustard oil preferred)
Chopped onion – ½ (regular size)
Ginger, – 1 teaspoon, finely chopped
Garlic – 2 cloves, minced
Chopped Tomato – 1
Tomato, crushed- ½ cup or 1 big tomato pureed with a hand blender
Cumin powder – 1teaspoon
Red chilli powder/Paprika – to taste
Coriander powder – 1.5 tablespoon
Garam masala – ¼ teaspoon
Kasuri Methi or Dried Fenugreek leaves (optional) – 1 teaspoon
Method:
Add ingredients 1-7 (mustard greens to salt) from the top list along with 1 cup water into a pressure cooker. Close the lid and cook it for two whistles on high heat. After two whistles, turn the heat off and then let the pressure release by itself.
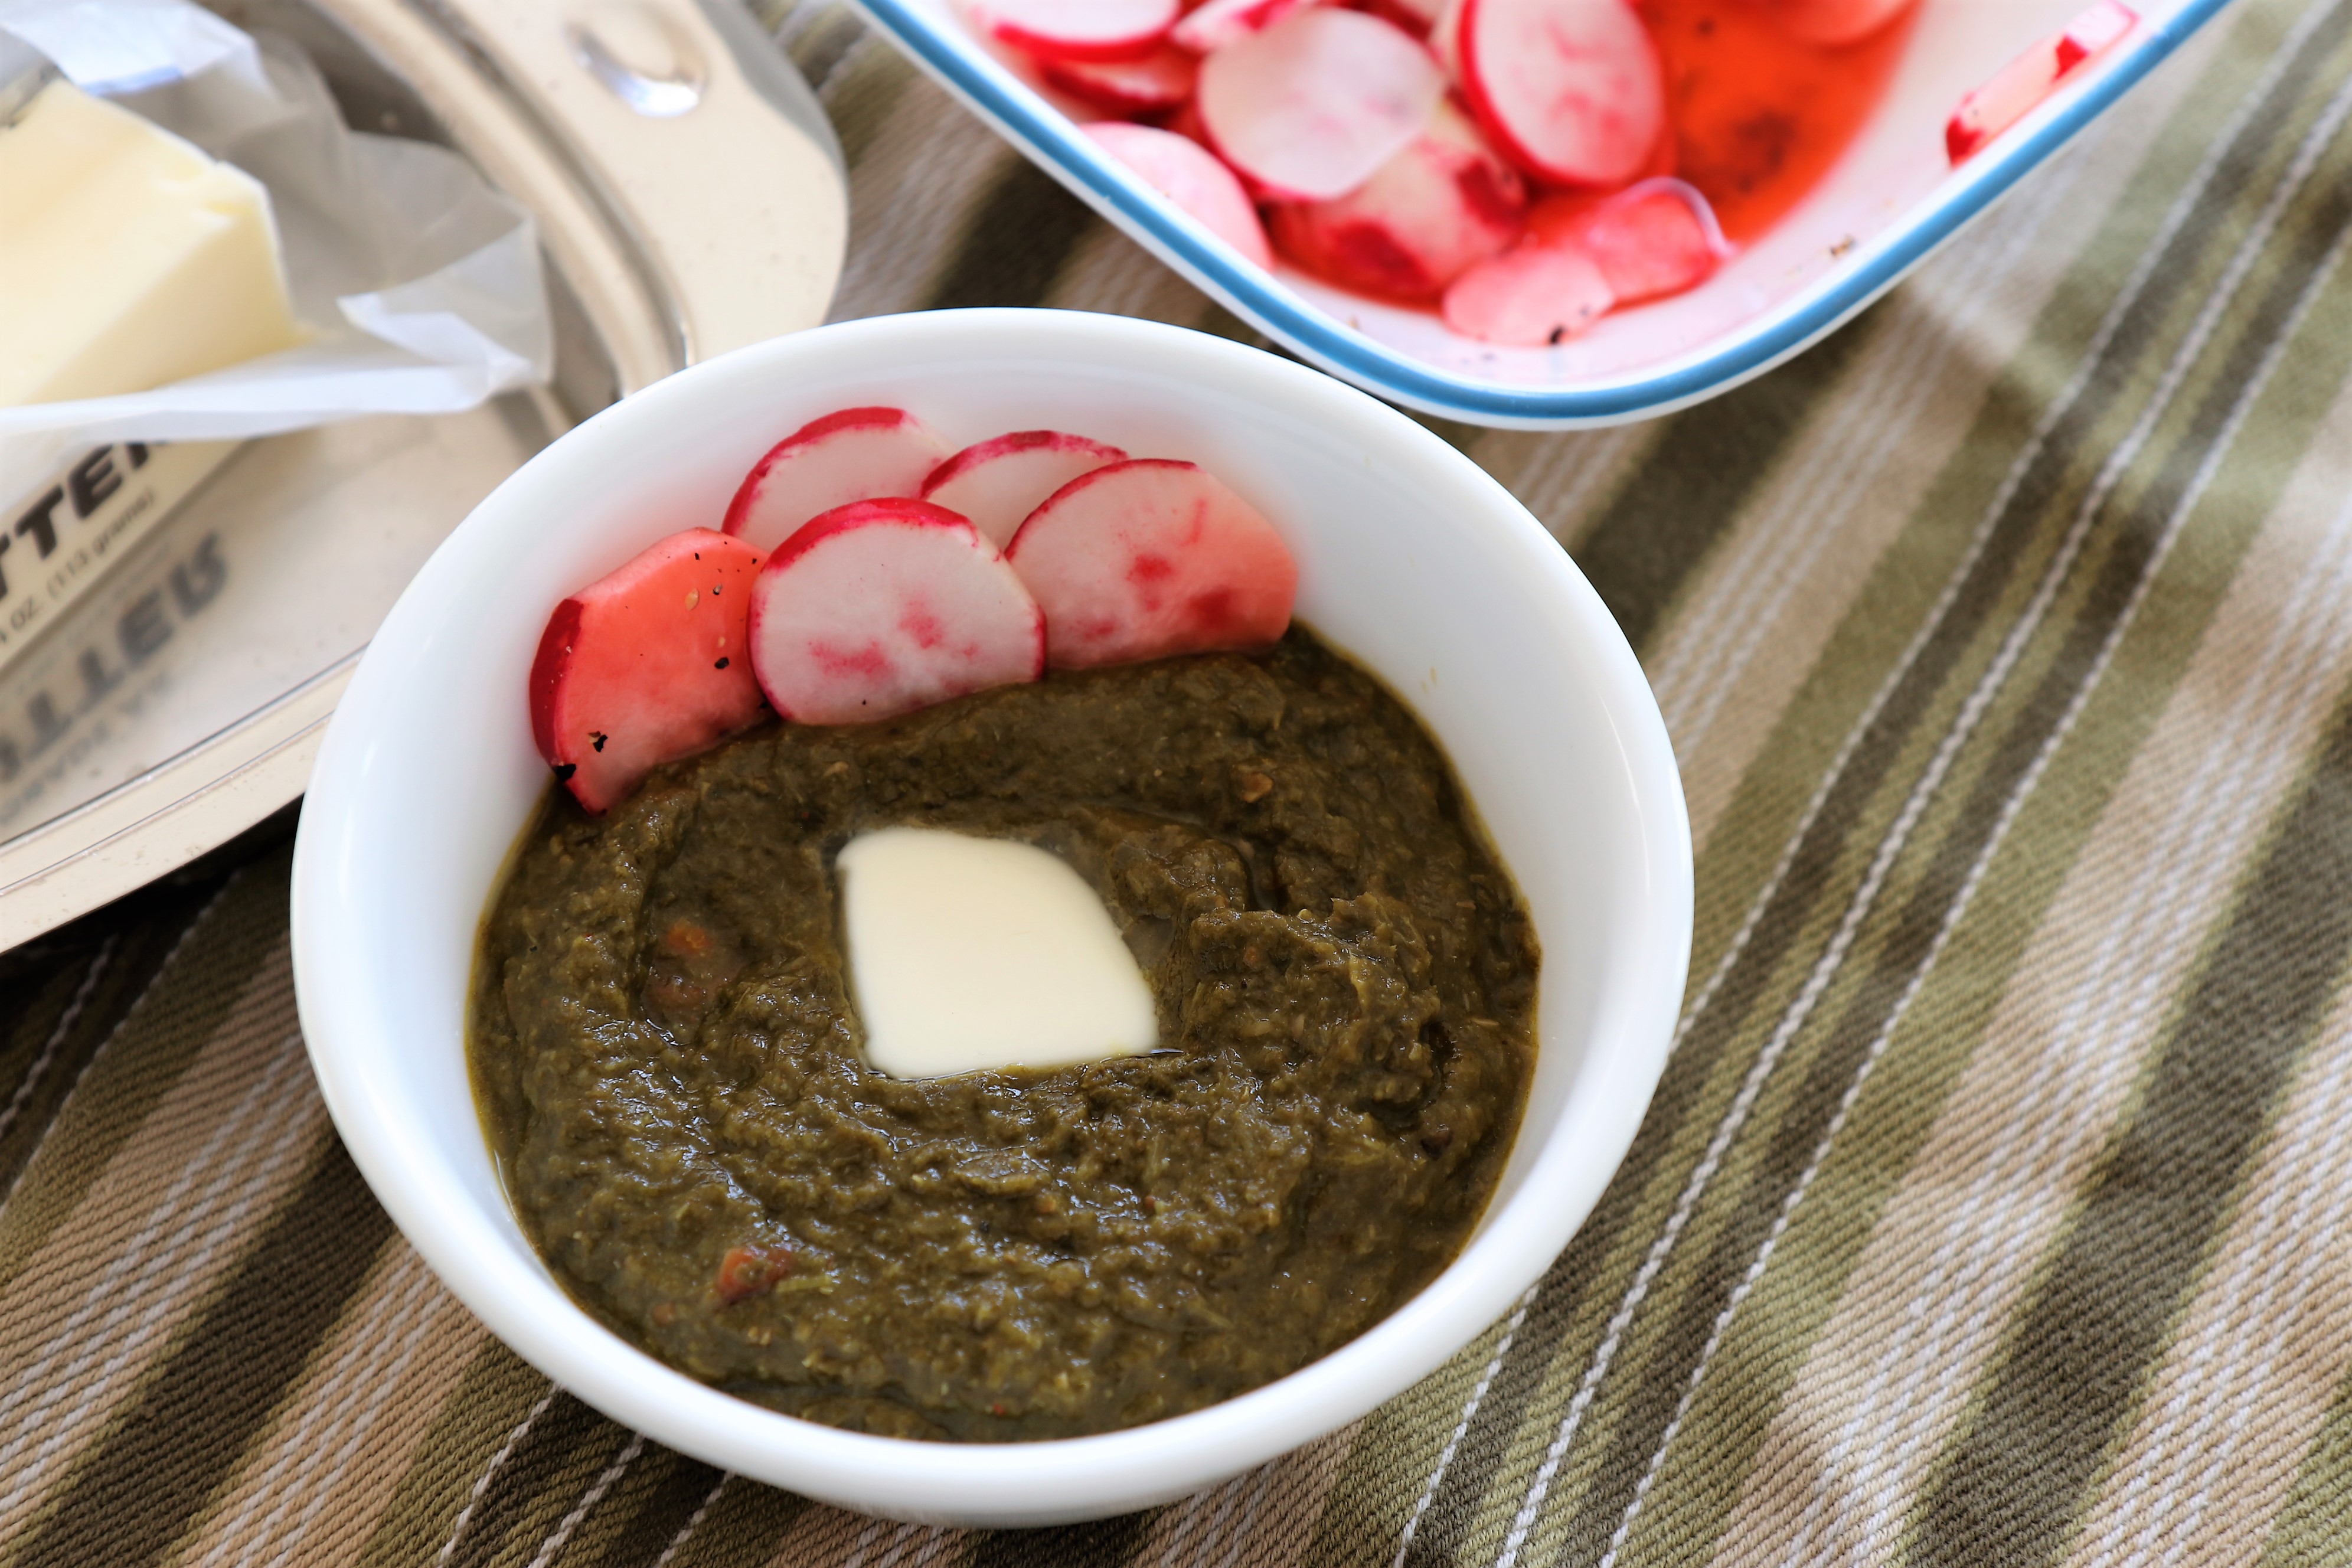
After the pressure has released, take the lid off and blend the greens with a hand blender to a consistency where you can still see some leaves (refer to the picture please) or in other words do not completely puree it.
Add the butter to the greens and return to heat, without putting the lid on or transfer into a big saucepan. Add the corn meal and mix. Let it cook on very low heat for at least ½ an hour.
In the meantime, prepare the masala or tadka. Heat oil in a heavy bottomed frying pan. Add the onions and sauté until light brown. Add ginger and garlic and mix. Add all the dry powders except the garam masala. Mix. Add the chopped tomatoes and stir. After a minute, add the crushed/pureed tomatoes and cook until oil separates from the ‘masala’. Now add the garam masala. Turn the heat off.
After ½ an hour, add the masala prepared above to the greens and add fenugreek leaves, if using. Serve hot with a dollop of butter and some sliced radishes. Goes well with makki di roti (Flat bread made with fine ground corn meal – almost like yellow masa) or Chapathi/roti (recipe here).
The recipe is a bit time consuming, but ..oh..so flavorful and totally worth it!.
Love – Vaishali.
Notes:
Slow Cooker – Put ingredients 1-7 (mustard greens to salt) in the slow cooker with a cup of water and cook on low for 4 hours. Add butter and makki ka atta, followed by the prepared masala (tadka) and cook for another 2 hours on low.
If you cannot find makki ka atta (fine ground corn meal), you can use besan (chick pea flour).
This Chilli Pickle recipe compliments saag and makki di roti beautifully!
Tools used:
Pressure Cooker
Frying pan
Knife and chopping board
Measuring cups and spoons
Hand blender
Spatula


Leave a Reply