
Make bakery-style, soft and fluffy Pav (Indian dinner rolls) at home with this easy recipe! These Mumbai-style ladi pav are soft, slightly sweet, and perfect for pav bhaji, vada pav, keema pav, or as dinner rolls for any meal. This eggless recipe uses simple pantry ingredients and creates the same soft, buttery rolls you'd find at an Indian bakery!
I'm teaching you how to make authentic Pav - those incredibly soft Indian dinner rolls you find at every Indian bakery. These are the best homemade dinner rolls I've ever made, and they all start with a straightforward 6-ingredient dough.
I make these whenever I'm craving pav bhaji, vada pav, or keema pav. They're soft as clouds with that signature flaky, buttery texture that makes Indian bakery bread so addictive. Fair warning: once your family tastes these, they'll demand you bake them on repeat.
🔎Pav Recipe at a Glance
- ⏱️ Total Time: 2 hours 45 minutes
- 👨🍳 Skill Level: Beginner-friendly
- 🍽️ Yield: 12 dinner rolls
- 🥛 Dietary: Vegetarian, Eggless
- 🌶️ Cuisine: Indian, Indian Street Food
- 📅 Perfect for: Pav Bhaji, Vada Pav, Keema Pav, everyday dinners
- 🛠️Special Equipment: Stand mixer (optional) and Oven
Didn't find what you were looking for?
Click the buttons below to ask an AI assistant for answer based on this recipe
Jump to:
- 🔎Pav Recipe at a Glance
- 🫓What is Pav? (Indian Dinner Rolls Explained)
- ✨Why you'll love this recipe?
- 📋Recipe Ingredients
- 📖Substitutions, Additions and Variations
- 👩🍳Steps to make this recipe
- 💡Vaishali's Tips!
- 🍽️Serving Suggestions
- 🫙Storage, freezing, and reheating instructions
- 🔨Troubleshooting Common Problems
- ❓FAQ
- Related
- Pav: Indian Dinner Rolls
🫓What is Pav? (Indian Dinner Rolls Explained)
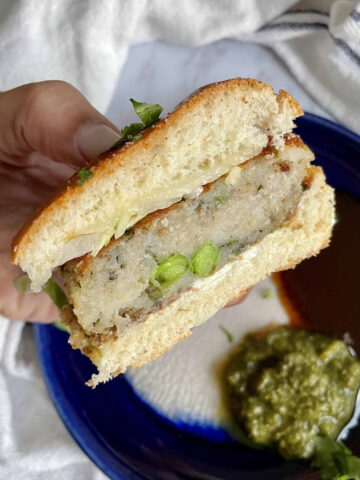
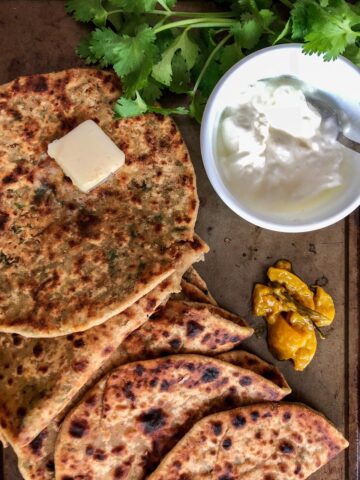
Pav (also spelled pao or pau) are soft, slightly sweet Indian dinner rolls that I believe originated in Mumbai. The name "pav" comes from the Portuguese word "pão," meaning bread. These rolls are a staple of Mumbai street food and are most famously served with pav bhaji, but they're also used for aloo tikki sliders, vada pav, keema pav, misal pav, or simply served as a bread with egg bhurji (Indian scrambled eggs) and many other dishes.
What makes Pav different from regular dinner rolls?
- Slightly sweeter with a hint of milk flavor
- Softer, more pillowy texture
- Baked touching each other (hence "ladi pav" meaning "row of bread")
- Golden, buttery top with soft sides
- Perfect for soaking up curries and sauces
Ladi pav specifically refers to pav that are baked in rows, touching each other, which keeps the sides soft while only the tops get golden brown. This creates that signature pull-apart texture that makes them perfect for Indian street food!
✨Why you'll love this recipe?
- Bakery-Quality at Home - Tastes exactly like Mumbai ladi pav from your favorite bakery. If you live anywhere outside India, you know that the dinner rolls are just not the same as pav!
- Eggless & Vegetarian - Perfect for those who avoid eggs
- Simple Ingredients - No special equipment or hard-to-find ingredients
- Beginner-Friendly - My detailed instructions will make bread-baking easy for you
- Make-Ahead Friendly - Prep ahead for parties or meal prep
- Versatile - Perfect for pav bhaji, sandwiches, or as dinner rolls
- Freezer-Friendly - Make a big batch and freeze for later
📋Recipe Ingredients

- Yeast: Active dry yeast or instant yeast both work. I have always made this recipe with dry yeast. If using instant yeast, you can skip the proofing step.
- Flour: All-purpose flour (maida) is traditional. Bread flour makes chewier rolls. Don't substitute with whole wheat for authentic pav.
- Milk: Whole milk creates the softest rolls. You can use 2% milk but results won't be as rich.
- Butter: You need room temperature butter, so plan ahead. I recommend using salted butter for both the dough and brushing. But unsalted butter won't sink the recipe, so use what you have.
Don't forget to check out the recipe card below for a complete list of ingredients along with the quantities.
📖Substitutions, Additions and Variations
- Garlic Pav: Add 1 teaspoon garlic powder to the all-purpose flour along with salt before kneading the dough, and/or brush the baked dinner rolls with garlic butter.
- Kneading by hand: Mix the dough in step 2 with a wooden spoon until a shaggy dough forms, then knead on a floured surface for 10 minutes until smooth and elastic. Add the butter and knead for 5 more minutes until the butter is fully incorporated and the dough is soft.
- Sliders: Divide the dough into 16 pieces instead of 12 and make slider-sized pavs.
👩🍳Steps to make this recipe
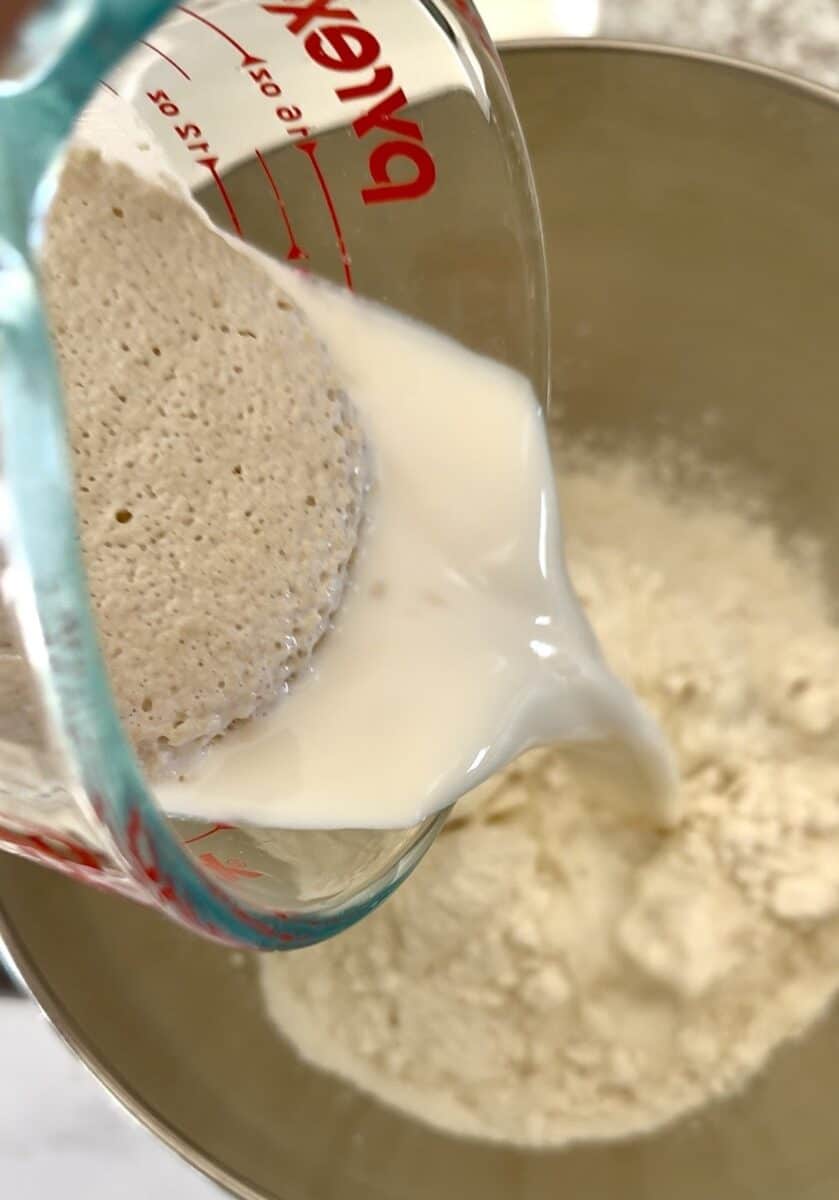
Step 1: Activate the Yeast (5 minutes) - Pour milk into a glass measuring cup and warm it in the microwave. The milk should feel warm to the touch, not hot (about 110 F). Add the sugar and active dry yeast. Whisk together and let sit for 5 minutes until foamy and bubbly. This proves your yeast is alive and active. If it doesn't foam, your yeast is dead - start over with fresh yeast.
Step 2: In the bowl of a stand mixer, combine all-purpose flour and salt. Mix the dry ingredients together and add the activated yeast mixture. Attach the dough hook.

Step 3: Knead the dough at low speed for 1 minute, then at medium-high speed for 4 minutes, adding the remaining ¼ cup milk slowly until fully absorbed. The dough should be smooth and pull away from the sides of the bowl.
Step 4: Add the butter and knead the dough for 2 more minutes at medium-high speed. The butter should be completely incorporated into the dough.


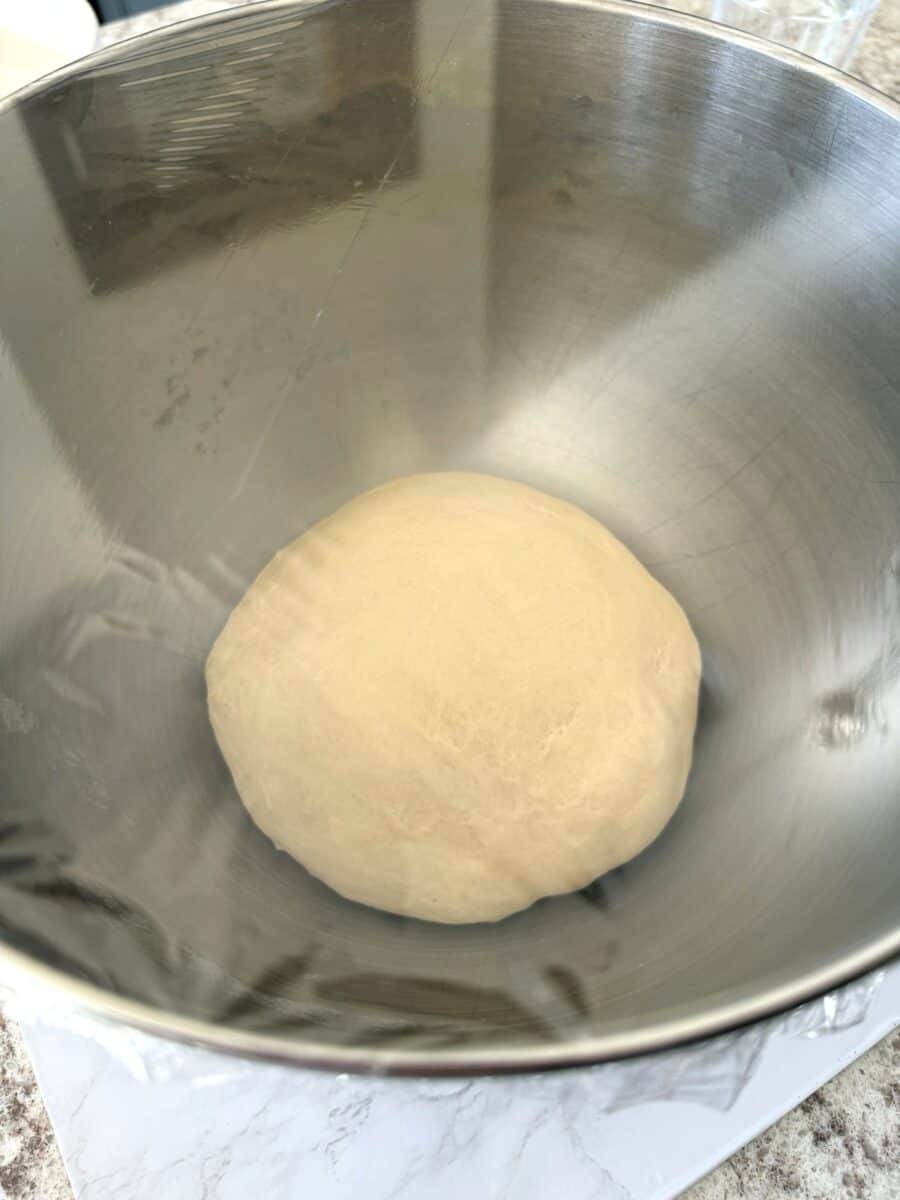
Step 5: Form the dough into a ball by tucking the sides under it. Cover with plastic wrap and let rise in a warm spot until doubled in size. This will take 1.5 to 2 hours. Where to let dough rise: Any warm corner of your kitchen (75-80°F/24-27°C is ideal). I put the bowl with the dough inside my turned-off oven with the light on. You could also put it near (not on) a warm stovetop.
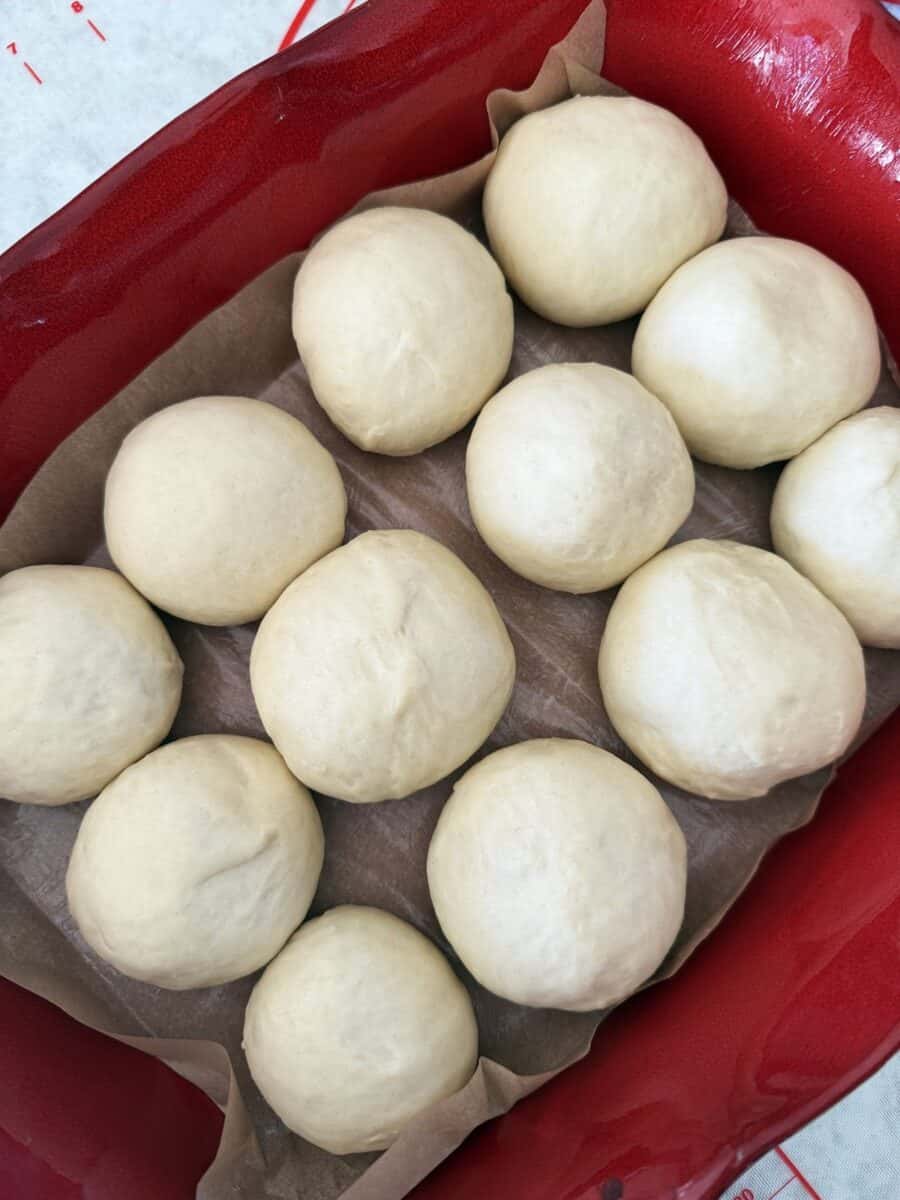
Step 6: After the dough has doubled in size, punch the air out and transfer it to a clean countertop or a silicone mat-lined surface. Press it to form a circular disc, then cut it into 12 "pie slices".

Step 7: Shape each piece by taking a pie slice of dough, cup your hand over it on the counter, and roll in a circular motion to create a smooth ball.
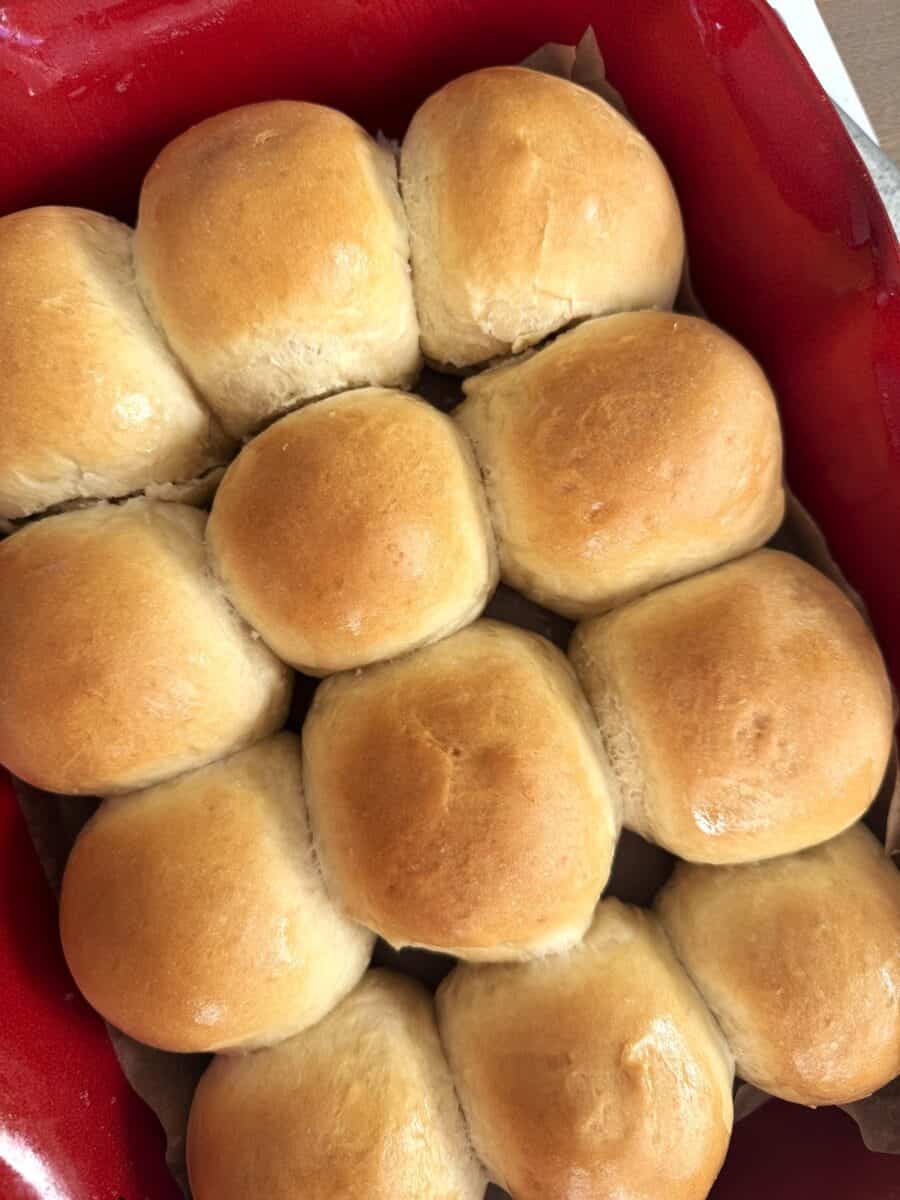
Step 8: Grease a 9x13 inch baking dish with butter, line with parchment and grease the parchment paper as well. Arrange the 12 rolls in 3 rows of 4, or 4 rows of 3. Cover with a kitchen towel and let the rolls rise for 30 minutes. After this second rise, the rolls should almost touch each other (to make the ladis or rows of pavs). While the rolls are rising, preheat your oven to 350 degrees F.

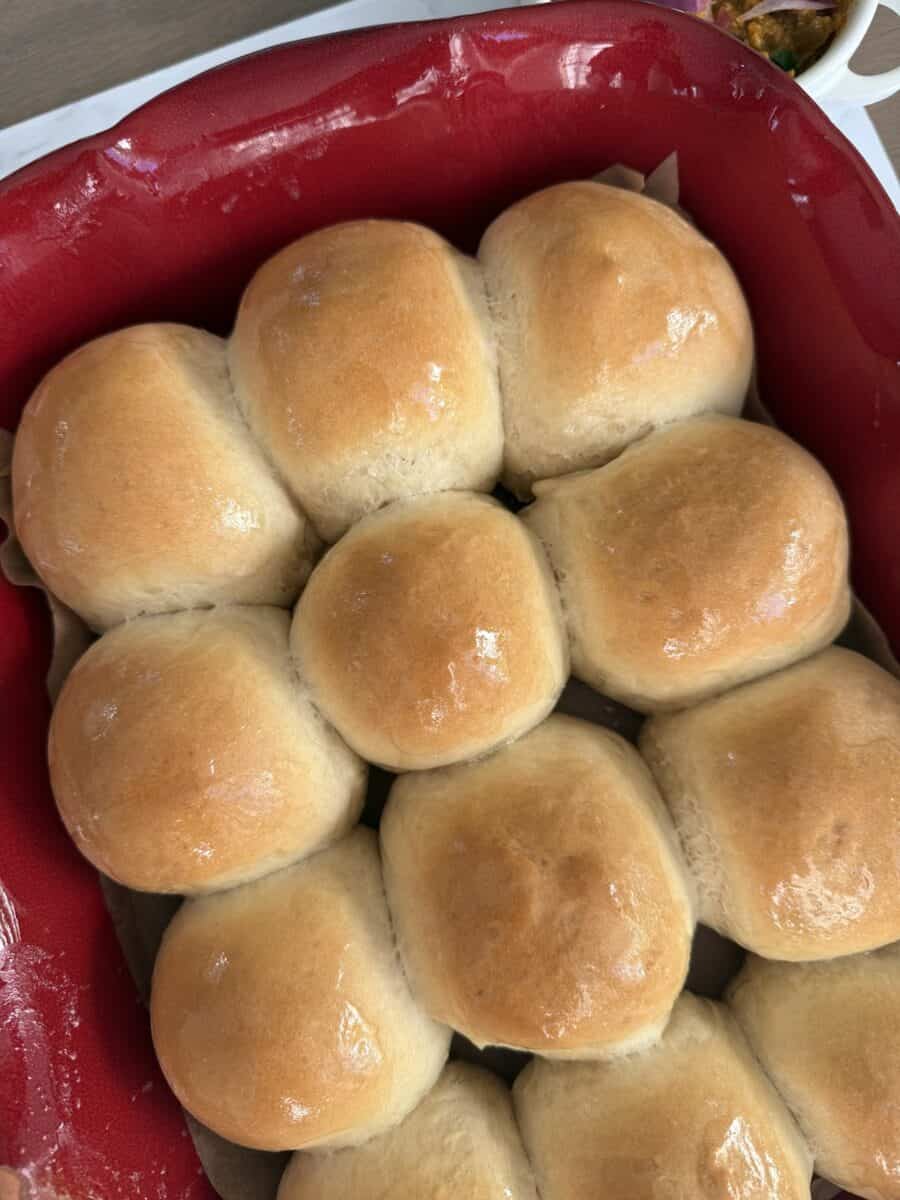
Step 9: Gently brush the tops of risen pav with milk (optional). Place in a preheated 350°F (180°C) oven and bake for 18-20 minutes, until the tops are golden brown. Don't over-bake; the sides should stay soft and pale; only the tops should be golden.
Step 10: As soon as pavs come out of the oven, brush the tops generously with melted butter. This creates that glossy, soft top and adds flavor. Cover with a wet paper towel and let rest for 5-10 minutes before enjoying.

💡Vaishali's Tips!
- Milk temperature: Milk that's too hot will kill the yeast. Too cold won't activate it. Test the temperature with your finger - it should feel like warm bathwater. If you have a food thermometer, now is the time to use it. The temperature should be around 110 degrees F.
- Dough: The dough should be soft and slightly sticky, but not overly wet. If too sticky, add 1 tablespoon flour at a time. If too dry, add 1 teaspoon milk at a time.
- Baking the rolls:
- Use the right pan size (9x13" so the rolls touch)
- Don't skip the second rise - this makes them fluffy!
- Brush with milk before baking for golden color
- Brush with butter immediately after baking and cover with a wet paper towel
- Don't overbake - sides should stay soft and pale
🍽️Serving Suggestions
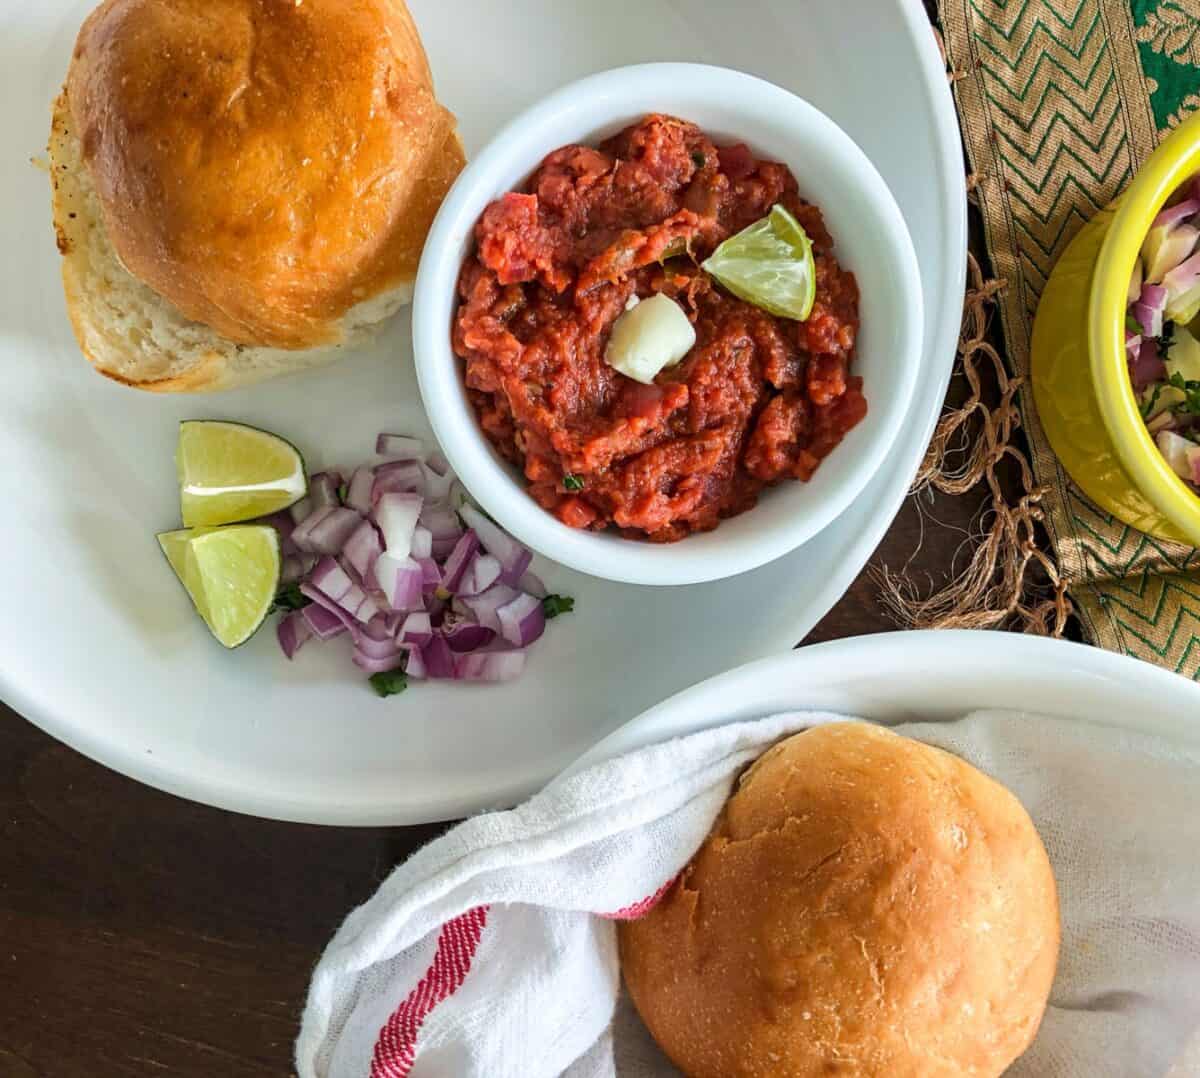
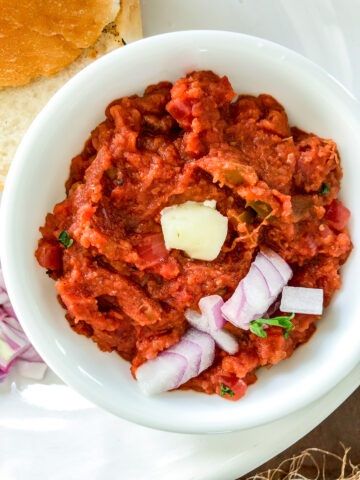
- Street Food: Pav Bhaji - Spiced mixed vegetable curry; Vada Pav - Fried potato patties in pav (Indian veggie burger); and Keema Pav - Spiced ground meat. Endless possibilities!
- Everyday Meals: serve pavs instead of bread with butter and jam (this seedless blackberry jam is a winner) for breakfast; as dinner rolls with chicken curry (delicious with coriander chicken) or mixed dal (perfect for soaking up the juices).
- Party Ideas: Divide the dough into 16 pieces instead of 12 and make slider-sized pavs. Then you can use them for aloo tikki sliders or any other slider recipe for parties and entertaining.
🫙Storage, freezing, and reheating instructions
- Room Temperature: Store in an airtight container or ziplock bag at room temperature for 2-3 days. They stay soft due to the milk and butter in the recipe.
- Refrigerator: I am not a big fan of putting the pavs in the refrigerator since refrigeration makes the dinner rolls taste stale. If you must, store in airtight container for up to 5 days, then reheat before serving.
- Freezer: To freeze, cool the baked pavs completely, wrap each pav individually in plastic wrap and then place in a freezer bag. You can freeze the pavs for up to 3 months. Thaw at room temperature and toast or warm in oven for freshly-baked taste.
- Reheating Tips: For authentic taste, reheat on a cast iron skillet with butter.
🔨Troubleshooting Common Problems
- Pavs didn't rise: This could happen if your yeast had expired or if the milk was too hot, killing the yeast. Always proof yeast first, check temperatures, and find a warm rising spot for the dough.
- Pavs are dense and heavy: This could happen if you under-kneaded dough (gluten didn't develop) or didn't let dough rise enough. Knead for full time as given in the recipe, and be patient with both the rises.
❓FAQ
Yes! You'll just need to knead by hand for 10-12 minutes instead of using a dough hook. It requires more effort but creates the same results. You can also use a food processor with a dough blade.
Pavs are slightly sweeter and use milk for a richer, extra-soft flavor. They're also baked touching each other, so only the tops brown, keeping the sides very soft - perfect for Indian street food applications.
Yes! After the first rise, punch down the dough, shape into pav balls, cover tightly, and refrigerate for up to 24 hours. Bring to room temperature (about 30 minutes), then do the second rise before baking.
Related
Looking for other recipes like this? Try these:
If you make this recipe be sure to leave a comment and let me know how you liked it! Share it on Instagram with the hashtag #thekitchendocs or share on Facebook, too.
Love – Vaishali

Pav: Indian Dinner Rolls
Equipment
Ingredients
- 1 and ¼ cup milk full fat, divided
- 2 teaspoon sugar
- 2 teaspoon active dry yeast
- 3 cups all purpose flour maida
- 2 tbsp butter plus more for brushing the pavs
- ½ teaspoon salt
Instructions
Activate the yeast
- Add 1 cup of the 1 and ¼ cup milk into a glass measuring cup and warm it in the microwave. The milk should feel warm to the touch, not hot (about 110 F). Add 2 teaspoon sugar and 2 teaspoon active dry yeast. Whisk to combine and set aside for 5 minutes until foamy and bubbly.
Prepare the dough
- Add 3 cups all purpose flour and ½ teaspoon salt to the bowl of a stand mixer. Whisk to combine. Pour the activated yeast mixture and attach the dough hook. Begin mixing the dough with low speed, slowly increasing the speed to medium high and knead for 5 minutes. The dough should pull away from the sides of the mixer bowl and should be smooth.
- Add 2 tablespoon butter and knead for another 2-3 minutes at medium-high speed. The butter should be completely incorporated into the dough.
Rest the dough (first rise)
- Form the dough into a ball by tucking the sides under it. Cover with plastic wrap and let rise in a warm spot until doubled in size. This will take 1.5 to 2 hours. Where to let dough rise: Any warm corner of your kitchen (75-80°F/24-27°C is ideal). I put the bowl with the dough inside my turned-off oven with the light on. You could also put it near (not on) a warm stove-top.
Form the rolls (and second rise)
- After the dough has doubled in size, punch the air out and transfer it to a clean countertop or a silicone mat-lined surface. Press it to form a circular disc, then cut it into 12 "pie slices".
- Shape each piece by taking a pie slice of dough, cup your hand over it on the counter, and roll in a circular motion to create a smooth ball.
- Grease a 9x13 inch baking dish with butter, line with parchment and grease the parchment paper as well. Arrange the 12 rolls in 3 rows of 4, or 4 rows of 3. Cover with a kitchen towel and let the rolls rise for 30 minutes. After this second rise, the rolls should almost touch each other (to make the ladis or rows of pavs). While the rolls are rising, preheat your oven to 350 degrees F.
Bake the pavs (Indian dinner rolls)
- Gently brush the tops of risen pav with milk (optional). Place in a preheated 350°F (180°C) oven and bake for 18-20 minutes, until the tops are golden brown. Don't over-bake; the sides should stay soft and pale; only the tops should be golden.
- As soon as pavs come out of the oven, brush the tops generously with melted butter. This creates that glossy, soft top and adds flavor. Cover with a wet paper towel and let rest for 5-10 minutes before enjoying.
Notes
- Milk temperature: Milk that's too hot will kill the yeast. Too cold won't activate it. Test the temperature with your finger - it should feel like warm bathwater. If you have a food thermometer, now is the time to use it. The temperature should be around 110 degrees F.
- Dough: The dough should be soft and slightly sticky, but not overly wet. If too sticky, add 1 tablespoon of flour at a time. If too dry, add 1 teaspoon of milk at a time.
- Baking the rolls:
- Use the right pan size (9x13" so the rolls touch)
- Don't skip the second rise - this makes them fluffy!
- Brush with milk before baking for a golden color
- Brush with butter immediately after baking and cover with a wet paper towel
- Don't overbake - sides should stay soft and pale
Vidhi says
Had to make them after I got the recipe newsletter. The pavs are so soft...remind me of my hometown bakery pavs. Had some with anda bhurji this morning.
Patti Roblyer says
Hi Vaishali!
I use my bread machine to make my roll dough and dough for runzas. Can I use my bread machine for this recipe?
Thank you-Patti Roblyer
Vaishali says
Hi Patti, Absolutely!!